#
Keycloak Management via API Access and User Creation
⚠️ This documentation is for keycloak <v20, see related ticket ⚠️
#
Introduction
You may wish to programmatically manage aspects of your Keycloak setup via the Keycloak API. This is particularly useful for tasks such as:
- Bulk User Creation
- Modifying group membership
- Assigning roles to many users
The following instructions will show you how to configure a Keycloak Client Service Account and assign appropriate permissions required for the management task.
Note
Important URLS https://<KEYCLOAK_HOST>/auth/admin/master/console/#/realms/<REALM>/clients https://<KEYCLOAK_HOST>/auth/realms/<REALM>/protocol/openid-connect/token
#
Configure a Keycloak Client
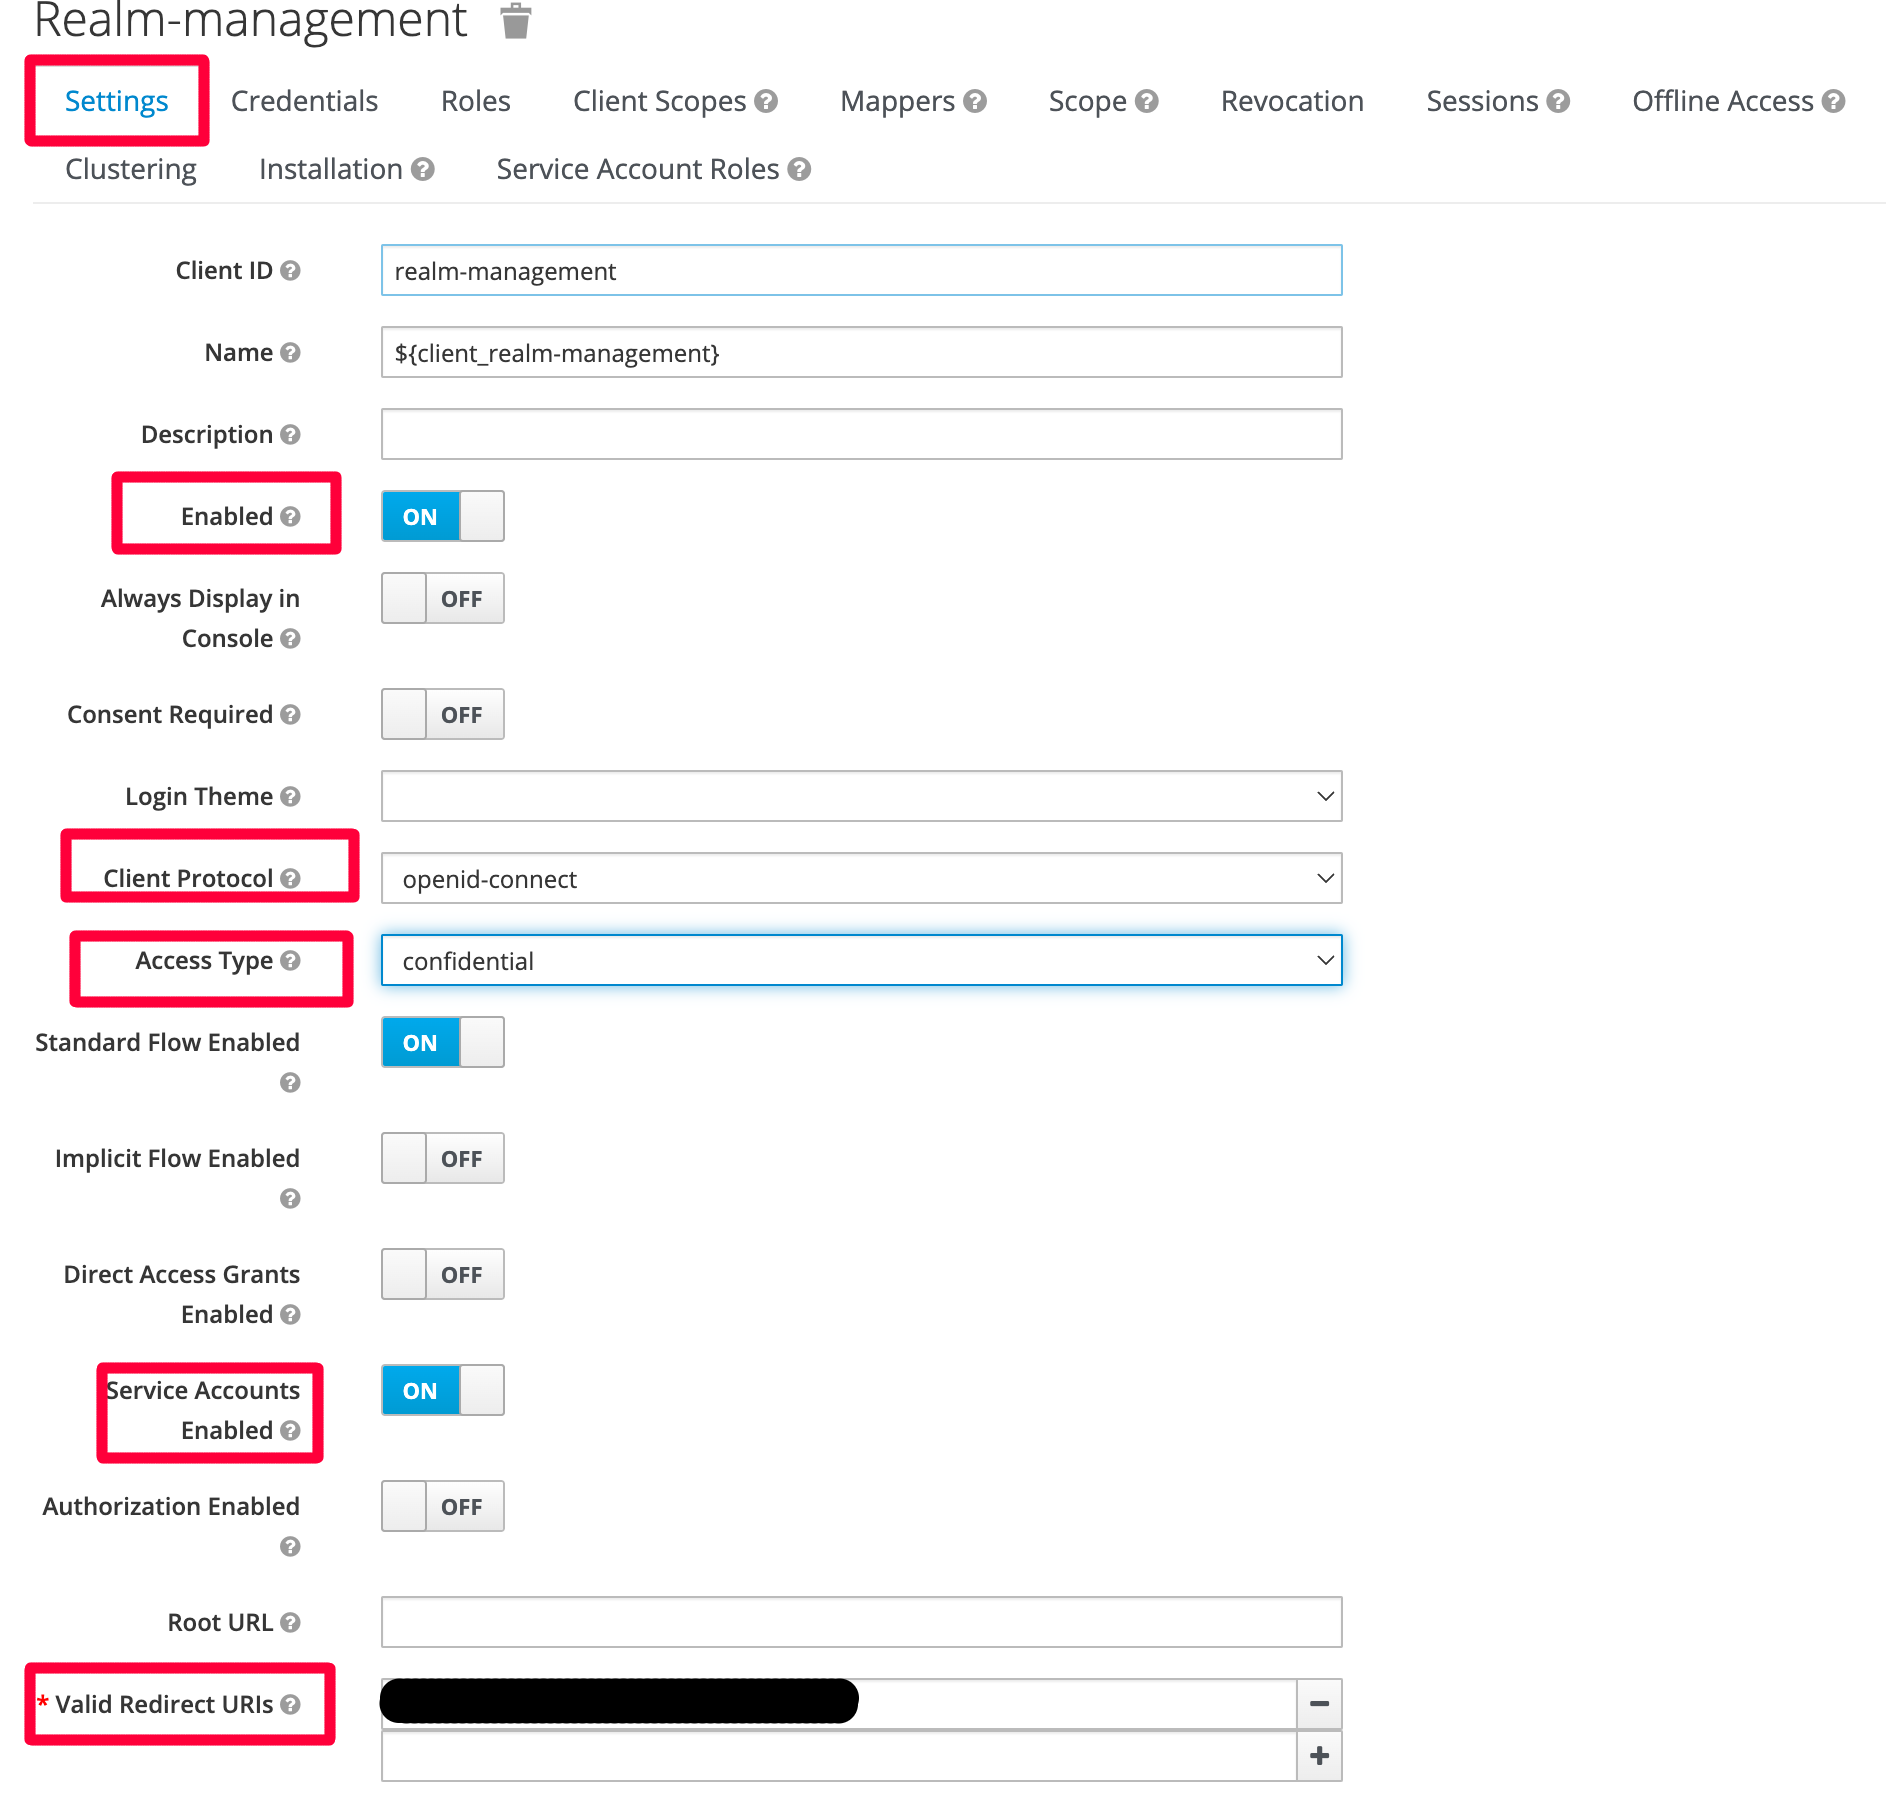
Navigate to: realm-management -> Settings tab
We’re using the realm-management client here but you can configure any other client. Make sure the following options are set.

Note
- The redirect url and service accounts enabled options will not appear on the UI until the Access Type -> confidential
- The Service Account Roles TAB will not show until Service Accounts Enabled: True
Tip
- Configure ONE client per application/script (set of scripts) that will make calls against the Keycloak API. That way you can manage/revoke permissions and also regenerate the client_secret if needed.
#
Obtain Client Credentials
Navigate to: realm-management -> Credentials tab
- Select
Client Id and Secret - Click
Regenerate Secretto generate a secret - Keep
ClientIdandSecretfor obtaining an access token from keycloak

#
Configure Service Account Roles
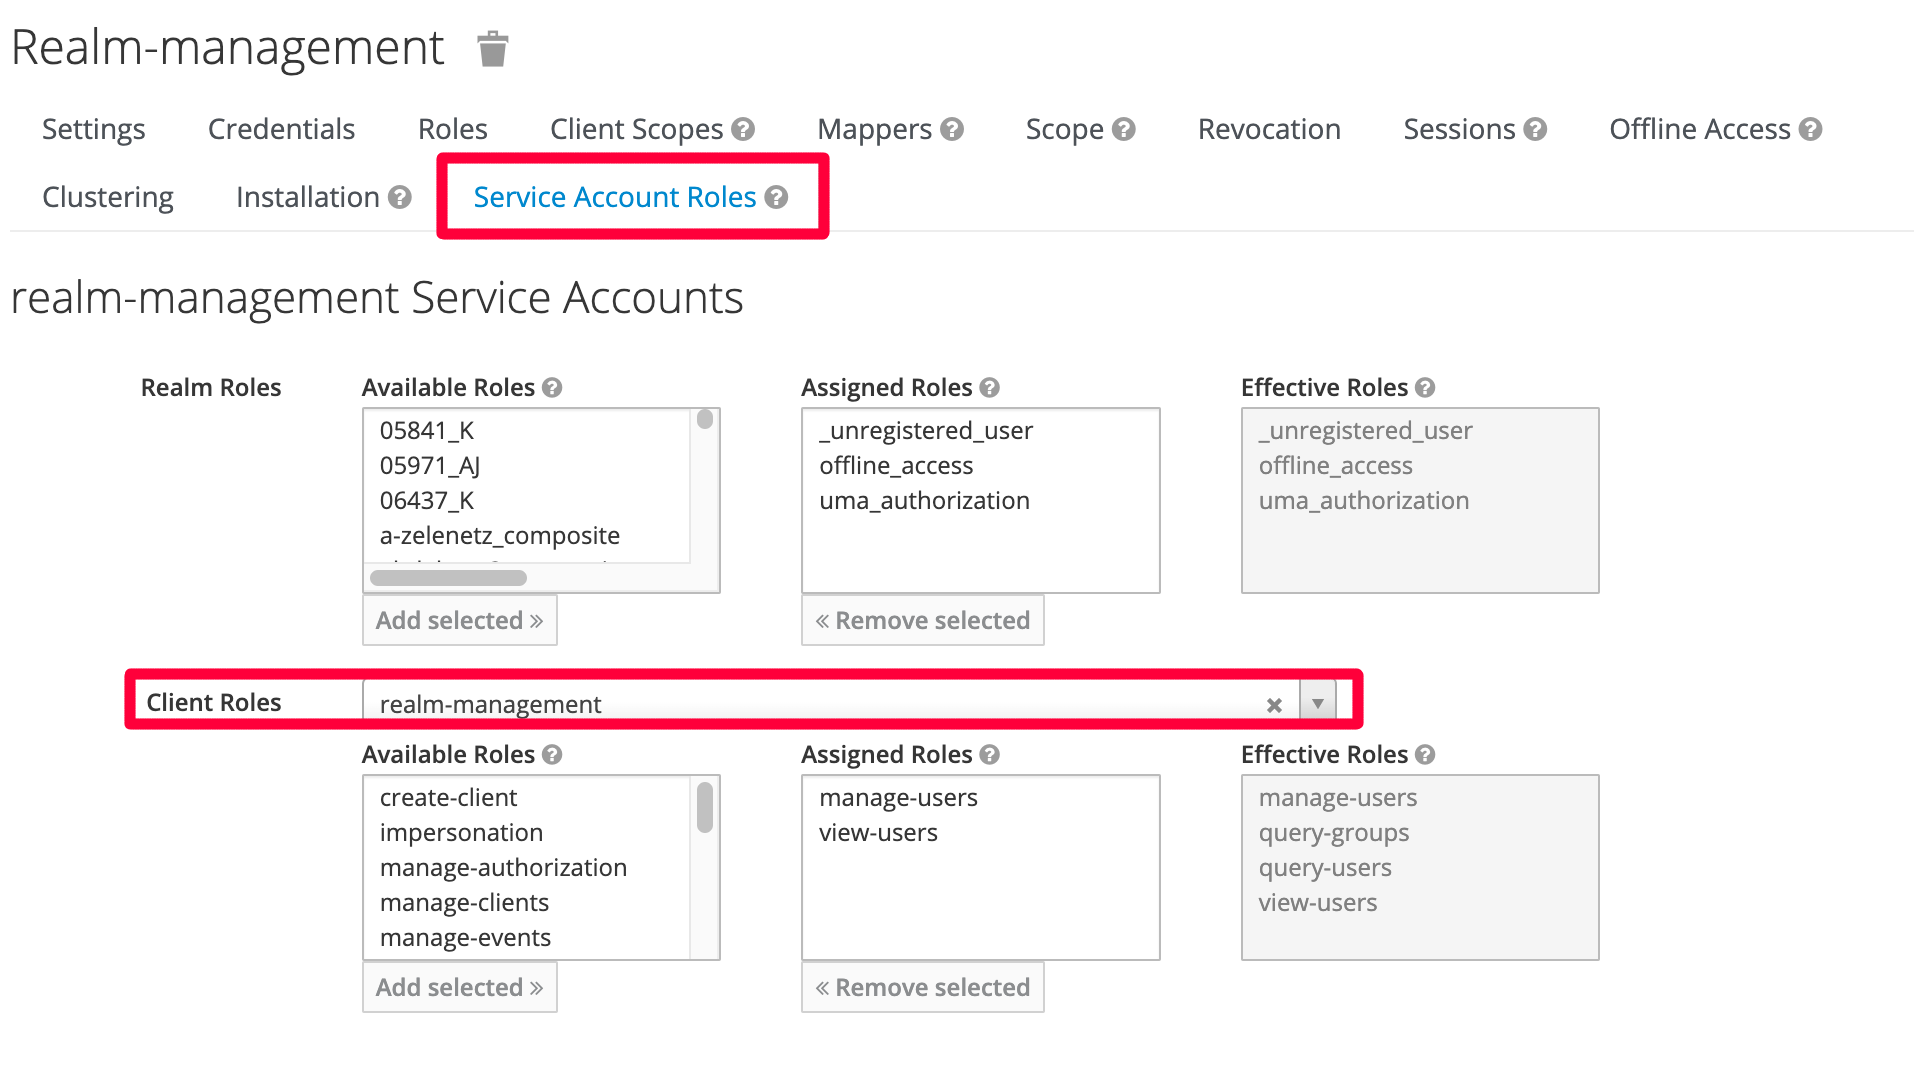
Navigate to: realm-management -> Service Account Roles Tab
Under Client Roles -> Select the realm-management from the dropdown menu
From here scroll through the available roles for the view-users roles. Click Add selected >>
Assign additional roles if needed.

Note
- For managing users, we want to assign “manage-users” and “view-users” roles to “realm-management”
- Only add the permissions you require for the tasks that will be performed.
#
Make API calls to the Keycloak 12 REST API
See Keycloak REST-API documentation
Provide client_id, client_secret, grant_type=”client_credentials” as x-www-form-urlencoded
- Make a call to the token service to obtain an access token
# Obtain an access token
curl -X POST https://<KEYCLOAK_HOST>/auth/realms/<REALM>/protocol/openid-connect/token \
    -H 'Content-type: application/x-www-form-urlencoded' \
    -d "client_id=$(KC_CLIENT_ID)" \
    -d "client_secret=$(KC_CLIENT_SECRET)" \
-d "grant_type=$(KC_GRANT_TYPE)" | jq '.access_token'- Send the token which each request
# Get keycloak users
curl -X GET https://<KEYCLOAK_HOST>/auth/admin/realms/<REALM>/users \
    -H "Authorization: Bearer ${ACCESS_TOKEN}" \
    -H 'cache-control: no-cache'
Note
- The access token by default only has a life of 300s (5min). This can be adjusted under the Settings Tab -> Advanced Settings Access Token Lifespan.
- These calls were made against Keycloak version 12 so they must include <KEYCLOAK_HOST>
/auth/
